I recently needed to replace the older, slower attached disks on our clustered SQL instance offline so as to copy each drive to newer, faster SSD drives. The task list below is what I followed to properly take SQL offline to that the old disks could be detached and the new SSD drives attached using the same drive letters.
1. RDP into the cluster Access Point name and load Cluster Manager tool.
2. Expand the Cluster server name in the tree view.
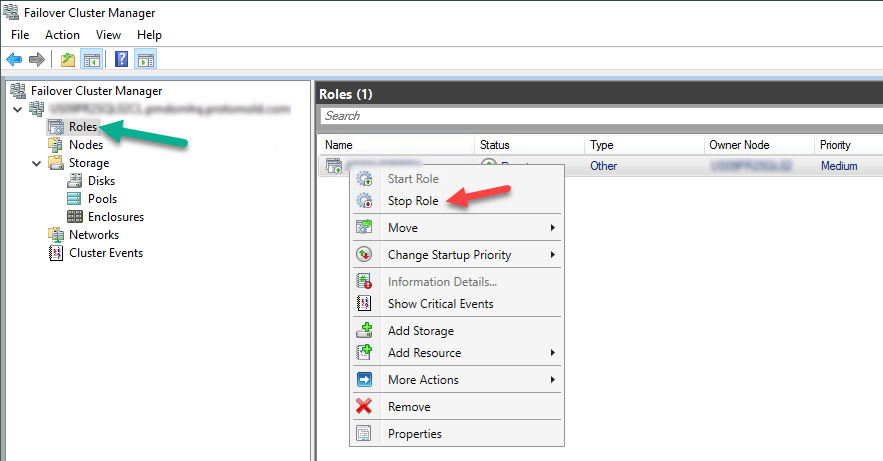
3. Click on the Roles icon.
4. Right-click on the cluster name in the right view panel.
5. Click on “Stop Role”. This will shut down all services running on the cluster nodes (i.e. SQL Server). Wait for the roles to stop safely.

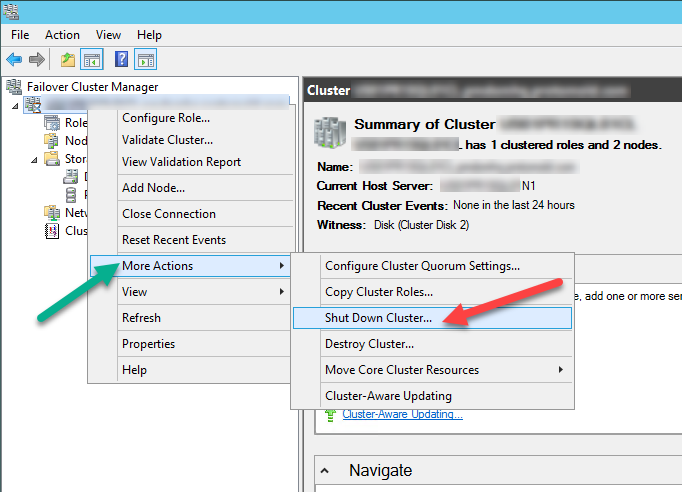
6. Right-click on the cluster server name in the left tree-view control.
7. Click on “Shut Down Cluster…”

8. Once the clustering services are shut down, you can then proceed to swap out the attached drives safely. The new drives should be an exact copy of the old as far as pathing and drive letter goes, so that the clustering services and SQL Server see the database files exactly where it expects them.
9. Once the new drives are attached, you then start the clustering services the same way to shut them down in the pop-up menu.
10. Once the clustering services has safely started, start the roles for the cluster the same way you stopped them in the pop-up menu.
11. The clustering services *may* report a warning stating that the attached drive(s) have a new identifier and that it has updated this automatically. This is ok and expected in this specific scenario. The drives should be available and all services started cleanly.
Views – 2220